26 September 2011

Anniversary


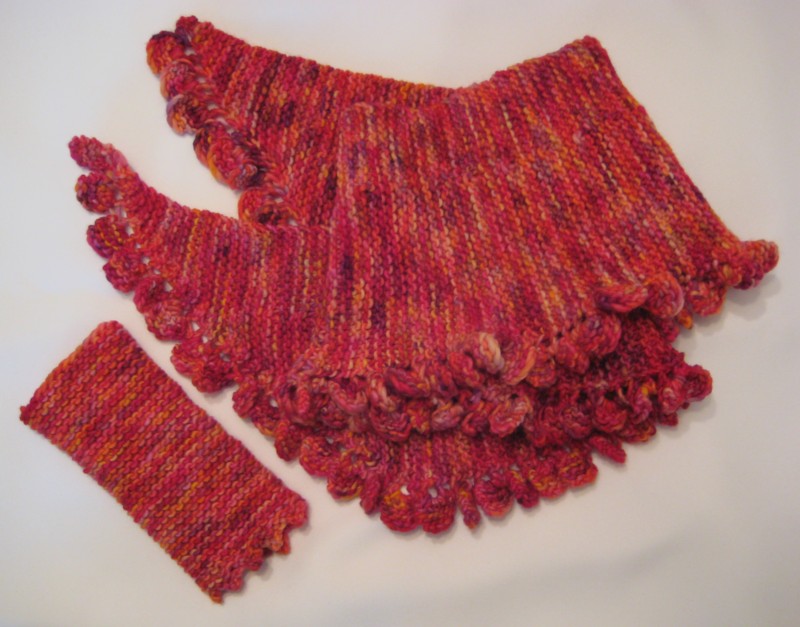
Today it is exactly one year since I started blogging. Here's a link to my first ever blog entry. I didn't have much to say, did I, but I had some cute boxes to show.

At first I regarded the blog as an experiment, and I didn't have much of a plan for what I was going to do with it. However, I knew that I needed something that would activate me into trying things out instead of just reading about them and planning to do them "later". I'm an information hoarder, and for me there's a real danger that I never get round to trying things out in practice, as it seems to be easier to read about them than to actually do the job. The past year has taught me that there isn't any substitute for experience. You can read every book there is on a subject, but actually trying it yourself is the best teacher.

Having a space where I can share my experiments and projects with other kindred spirits has really helped me activate myself, and I love sharing my discoveries with you readers. A year ago I thought it was such a shame that I had hardly anyone to share my discoveries with and perhaps to inspire. By now my blog has had visitors from over 50 countries from every continent except the Arctic and Antarctic. Amazing!

A big thank you to all my readers! Please don't hesitate to leave comments and suggestions on the blog, and if you don't want to leave an official comment, you're welcome to e-mail me on the address provided to the left. I'm looking forward to hearing from you! And please continue to visit my blog, as there is plenty more coming this way. I have big plans and I'm bursting with ideas.

25 September 2011

A Job Well Done

To my great relief, the project that has been my bane at the office for the last four weeks was finally wrapped up on Friday. To celebrate, I went by a chocolaterie on my way home and bought four handmade pralines to enjoy with a cup of tea. Flavours: champagne, cherry-orange, strawberry-lime and mocha.

Makes your mouth water, doesn’t it?


After tea and chocolates, inspiration descended upon me and I made my first multicoloured stamp. I learned this technique from Melanie Testa and Patricia Gaignat at least a year ago, but haven’t tried it before now. There are a number of circumstances why the time was ripe for me to try it now, and here are the top three:

1. Melanie has been making and using multicoloured stamps a lot lately, and has blogged about it, so that whetted my appetite.

2. At the crafts fair that I visited a couple of weeks ago I found double sided self-adhesive film, which makes it super easy to attach craft foam shapes to transparencies. So far I haven’t been able to find self-adhesive craft foam here, so this is the second best thing. What a relief not to have to mess around with glue any more!

3. A few months ago I came across an interesting product called Tack-n-Peel (by Tsukineko). This is a sticky and reusable cling sheet that you can attach to a piece of acrylic. You can then use this print block for unmounted stamps or [...drum roll...] craft foam shapes that are attached to a piece of transparency.

This craft foam, self-adhesive film, transparency and Tack’n’Peel on a block of acrylic combo is a real winner in my world, because these stamps are easy to make, the materials are inexpensive, the transparency backing is a real space saver, and the cling sheet on a block of acrylic gives the flimsy transparency backed stamp stability when needed, AND it creates a transparent print block, so you know exactly where you place your stamp. The advantages never seem to end. I’m sold.

Different parts of a multicoloured stamp. 
Many of these shapes can also be used on their own.


The stamped image


Now I need to think about inkpads. My collection of inkpads isn’t very big, as I haven’t been much into stamping so far. Here’s another blog entry where I discuss stamping. However, when stamp-making has become as easy as this, I might actually catch the pox and start making more stamps. They are after all a great way of trying out ideas in your sketchbook.


PS. Look at these yummy scissors (from Fiskars) that a friend gifted me! Don’t they make you wanna pull out your fabrics and start cutting? 

18 September 2011

She's Smiling Now

A quick Franka update. I felt inspired to continue my work on the Franka wall quilt today, and got on quite a bit. It's great to see the smile on her face. I couldn't bear to stop until her face was in place.


If you wonder how I keep track of everything, this is how I do it:


I number every pattern piece after I've drawn it on tracing paper. I have also given each separate fabric a letter, and after I've decided what fabric to use for a certain pattern piece, I write the letter after the number. When I've traced the pattern piece onto paper-backed fusible web, fused it onto fabric and cut it out, I draw a line after the letter. And finally, after I've fused a pattern piece in place on the quilt, I tick it off on the list. I feel slightly silly to share this list with you, as there's something slightly control freakish about it, but if you have a closer look, you'll see that there are 87 pieces listed already, and a few more still missing, so I need something to help me keep track of everything. Some of the pieces are so complicated that I don't want to have to cut them out twice if I can help it. (Ask me how I know...)

Have a great week everyone!

17 September 2011

From Uruguay with Love

It’s still pretty quiet in Lundaland. We’re having a very busy period at the office, and I’ve felt quite drained for the last couple of weeks. Therefore I haven’t had the energy to be particularly creative. As usual, when my energy levels are low, I’ve regressed into knitting. I find knitting and the handling of soft wool very soothing and meditative when my brains need a time out.

Last weekend my mum came over for a visit, and we went to a crafts fair together. I found some interesting things, but my best catch was a couple of skeins of hand-painted 100% merino wool from Uruguay. I couldn’t believe it that this amazing and exotic yarn had found its way into my hands.

Hand-painted 100 % merino wool from Uruguay (!)

I decided that I was going to make the yarn into a shawl or scarf, and back home I started searching the Internet for inspiration. I soon found a fun scarf pattern in the pattern library of the Drops Design site. I was amazed at the amount of free patterns that they so generously offer on their site. Do head over there and have a look. There are 14 different languages to choose from, so it’s very user-friendly! I salute that web site. Excellent stuff.

The scarf pattern I chose is this one. It’s nothing like your average knitted scarf, and I really like the tapered ends and the fun bobbles along the lower edge. Isn’t the yarn delicious too? I’ve been lusting after it since I first laid eyes on it. But I didn’t let it distract me from my Uruguayan wool, though.

Knitting in progress. Some rows were only worked halfway before turning back, and that created a curved edge (as there were more rows squeezed in on the lower edge than on the upper edge). Pretty clever, eh?


It didn’t take me even a week to finish the scarf, and I enjoyed making the bobbles and the curved shape, as it provided enough variation to keep it all interesting. Below is an image of the finished scarf. There was some wool left over, so I’ve started on a pair of matching wrist warmers too. This set will keep me snug and warm when winter comes.


4 September 2011

Fire Festival and Fun with Franka

It’s been quiet in Lundaland for a couple of weeks. Creatively speaking, that is. I’ve had a lot going on both at work and at home. And I’ve been to Ostrobothnia to visit my folks. I chose last weekend, because that was the time of the Venetian festival that is celebrated in my home area by the end of August every year as a farewell to summer.

Fire and fireworks


Today, however, I’ve been back with a vengeance, and took a great leap forward with the Franka quilt. I’m very happy to reveal that I’ve cut and fused the background (water) to the black base fabric today. That’s one of the scariest stages finished. I’ll walk you through my day with some photographs.

I started by cutting out the upper right hand corner. I was quite relieved to discover that this corner formed a separate piece, as it reduced the size of the main piece, and gave me a chance to practise a bit before I had to tackle the main piece.


I knew that cutting out the pieces, as well as positioning them, was going to be tricky. To help me with the positioning, I used the master paper pattern for the background, a touch screen pen and a pair of tweezers. I laid down the pattern on the black fabric, pressed the touch screen pen to the pattern at certain points to make temporary marks on the fabric, lifted a corner of the pattern, positioned the background fabric piece on the base fabric, aligning it with the markings that I’d made, repositioned the pattern and used my fingers and the tweezers to make sure that everything was properly lined up before I ironed everything down.


To cut out the pieces, I used a combination of scissors and a craft knife. Note the old baby sheet that is placed under the fabric. It’s there for a reason. After I’d cut out the first background piece, I felt a bit sweaty about the next piece, and I must admit that, for a few seconds, I wondered what I’d gotten myself into. Then a solution came to me. If I placed the piece to be cut on another piece of fabric, I would be able to turn the whole piece around easily while cutting, without having to let anything dangle freely with the risk of things getting tangled up and tearing. I only needed to lift the area where I was working, and the rest could rest undisturbed on the sheet while I was turning the fabric around. It worked like a charm. (And probably saved my sanity.)


As for cutting technique, it’s a good idea to start with the small interior areas, and save the big areas for last.


The main background piece is completely cut out. The next step is to position it on the base fabric.


Speaking of sanity, you have to be a bit mad to wanna do this. :D


The background is fused to the base fabric. This silhouette is so cool that I’m tempted to leave it like this. But, no, I’ll save the silhouette idea for another quilt. I’m really excited about this quilt right now, and I’m annoyed that I have to go to work tomorrow. My day job is severely trespassing on my quilting time. :P


PS. Those of you who are waiting for the instructions for the needle-felted hearts that I promised to provide: I’m sorry to have kept you waiting, but I haven’t forgotten. I will post them soon.